To create my film review I used Microsoft Publisher, I used this software because I needed to use large amounts of text. Also the software allows me to manipulate text and pictures, easily moving it around when needed.
As shown before in a previous post, I used Adobe Photoshop to make my poster, it is several layers on top of each other and I tried to give a cartoon/comic effect, but also maintaining the feel of a teenage film with bad events, which is why the characters are almost lurking in shadows.
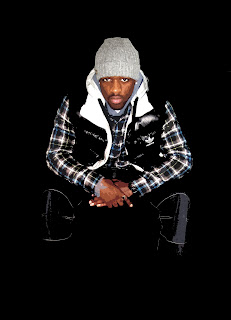
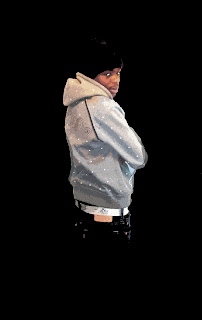
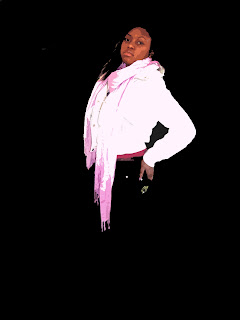
I used these main images of my actors on my poster. I used Photoshop, following the previous techniques to create the effect. I then used images from Google for a background (tower block silhouette) and other featured objects (the lamppost and brick wall). I then used fonts from a website previously presented (under websites used) to create the text for my poster.
I Used this call sheet to keep track of my actors, it had their contact details so I could easily get in touch with them when I needed them for filming, or pictures, Ect.
I looked at these fonts for my poster. I wanted to use some that were easy to read yet had an effect on the reader. In the end I only decided on using two. If I would have used to many fonts on my poster it would have looked messy and tacky.
After looking at the layouts and language I know what i have to includ into my film review. I want to make my review informative just like my short film, but also keeping it enjoyable to read. I want it to have a very simple layout, being consistent with my poster and film. I'll use a simple layout, one that is neat and basic, few pictures and will have a simple background and text, which contrast from each other. Here are some layout ideas: